
Effective landscape architecture begins long before the first ornamental shrub is placed in the ground. It starts with the invisible health of the site, specifically the management of the soil microbiome and the elimination of competitive weed species. For homeowners and contractors seeking to establish a pristine outdoor environment, the challenge often lies in aggressive invasive species or soil-borne pathogens that compromise curb appeal and plant longevity. Traditional chemical interventions can be heavy-handed, often leaching into groundwater or damaging the delicate balance of beneficial organisms. This is where mastering Soil Solarization Basics becomes a transformative tool in your consultancy toolkit. By harnessing the power of radiant energy, we can sanitize the earth, creating a sterile yet biologically receptive canvas for high-end design. This method ensures that the functional goals of the landscape, from lush turf to intricate floral borders, are met without the constant pressure of weed encroachment or fungal decay.
Sustainable site preparation focuses on long-term viability rather than immediate, short-lived fixes. When we consider the functionality of a residential or commercial garden, the presence of persistent weeds like nutsedge or Bermuda grass can undermine even the most sophisticated architectural lighting and hardscaping. Solarization acts as a thermal reset button. It utilizes clear polyethylene plastic to trap heat, raising soil temperatures to levels that are lethal to most weed seeds and harmful nematodes. This process requires a strategic window of four to six weeks during the peak of summer heat, but the dividends it pays in reduced maintenance labor and increased plant vigor are unmatched. As we plan for walkways, seating areas, and focal points, the reduction of an underground seed bank allows for cleaner edges and more defined transitions between different garden rooms and materials.
Landscape Design Principles
A successful landscape design relies on the harmony between structural elements and organic growth. When incorporating Soil Solarization Basics into your master plan, symmetry and balance should be at the forefront of the spatial arrangement. A symmetrical entry garden, for instance, requires perfectly pruned hedges and uniform groundcover to maintain its formal aesthetic. If weeds infiltrate these zones, the visual balance is shattered. By solarizing these areas before planting, we ensure that the Buxus sempervirens or Taxus rows remain the undisputed focal points, free from the distraction of opportunistic growth.
Elevation layers constitute another critical design principle. Incorporating multi-level garden beds or retaining walls creates depth and visual interest, but it also alters how heat is absorbed and retained in the soil. Raised beds typically heat up faster than flat ground, making them excellent candidates for solarization. During the planning phase, we must also account for irrigation. Drip systems should be designed to provide uniform moisture, as solarization works most effectively when the soil is damp, allowing the steam to penetrate deeper into the substrate. This integration of hydraulic engineering with thermal treatment ensures that the subgrade is prepared to support the ultimate vision of the landscape architect.
Landscaping is not merely about what is visible; it is about the negative space and the transitions. Walkways, whether constructed from flagstone, decomposed granite, or pavers, must be bordered by clean, crisp vegetation. Solarization prevents weeds from migrating under the hardscape and emerging through the joints, which can otherwise lead to the shifting and cracking of expensive masonry. By viewing the soil as a structural component rather than just a growing medium, we elevate the outdoor environment to a professional standard that prioritizes both beauty and structural integrity.
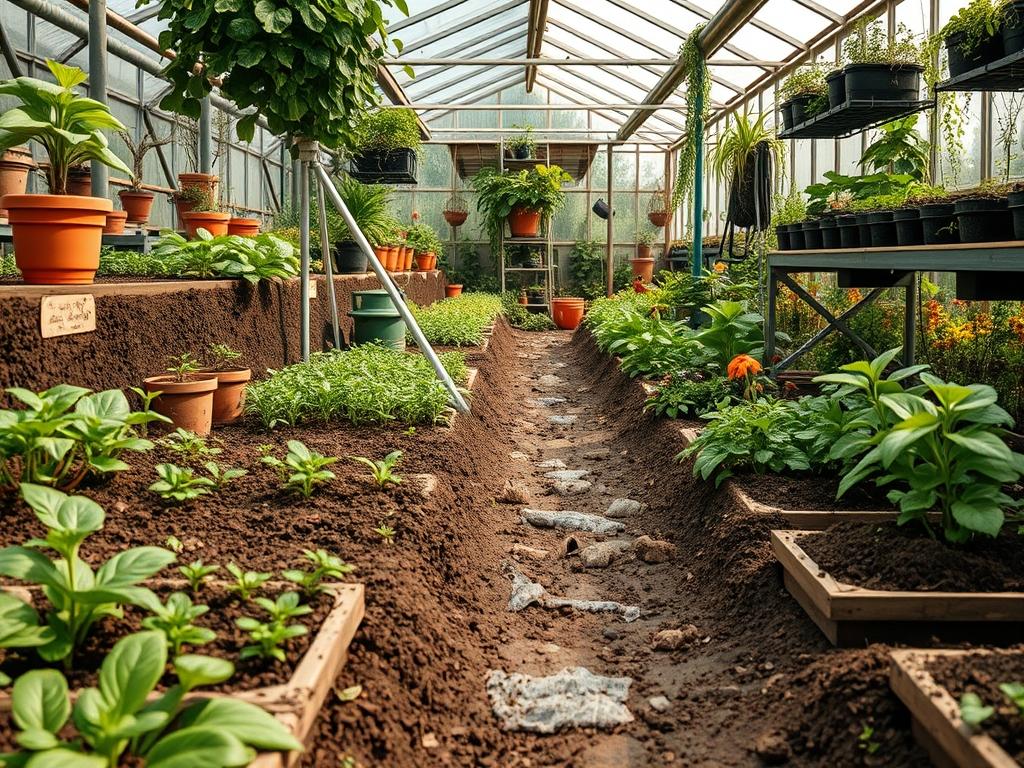
Plant and Material Selection
Selecting the right flora is contingent upon the geographical climate and the specific conditions created post-solarization. Often, the process of solarization makes certain nutrients more available, providing a temporary boost to newly installed specimens. Below is a guide for selecting plants that thrive in a renewed, post-treatment landscape.
| Plant Type | Sun Exposure | Soil Needs | Water Demand | Growth Speed | Maintenance |
| :— | :— | :— | :— | :— | :— |
| Lavandula angustifolia | Full Sun | Well-drained | Low | Moderate | Low |
| Buxus microphylla | Full/Partial | Loamy/Neutral | Medium | Slow | High (Pruning) |
| Echinacea purpurea | Full Sun | Rich/Organic | Moderate | Fast | Medium |
| Festuca glauca | Full Sun | Sandy/Gritty | Low | Moderate | Very Low |
| Hydrangea macrophylla | Partial Shade | Moist/Acidic | High | Medium | Medium |
| Calamagrostis acutiflora | Full Sun | Clay/Loam | Medium | Fast | Low |
The choice of mulch is equally important. After solarization is complete and the plastic is removed, applying a 3 inch layer of hardwood mulch or pine bark nuggets helps suppress any surface-level seeds that might blow in from neighboring properties. This mulch also helps maintain the moisture levels required for the root systems of newly installed native plants.
Implementation Strategy
The execution of Soil Solarization Basics follows a strict technical protocol to ensure maximum efficacy. First, the area must be cleared of all surface debris and large rocks. Grading the site is essential; the surface should be as smooth as possible to allow the plastic to lay flat against the earth, minimizing air pockets that can act as insulators and reduce the temperature. If the soil is compacted, a light tilling may be necessary, but excessive depth should be avoided as it may bring up colder soil from the lower strata.
Once the site is graded, the soil must be thoroughly irrigated until it is saturated to a depth of 12 inches. This moisture conducts heat more effectively than dry air. The next step involves laying down 1.5 to 2 mil clear plastic. Black plastic is less effective for this purpose because it absorbs the heat itself rather than allowing it to pass through to the soil. The edges of the plastic must be “trenched” or buried in a 6 inch deep furrow and backfilled with soil to create an airtight seal. This prevents the escape of hot air and moisture, creating a greenhouse effect that cooks the pathogens below.
Monitor the plastic regularly for punctures or tears caused by wildlife or falling branches. Small holes can be patched with clear outdoor tape to maintain the seal. After the treatment period, usually 4 to 8 weeks depending on the intensity of the sun, the plastic should be carefully removed. It is crucial not to till the soil deeply after this process, as doing so will bring up viable weed seeds from the untreated depths, negating the work performed. Instead, transplant your nursery stock directly into the treated top layer.
Common Landscaping Failures
One of the most frequent errors in landscape installation is neglecting the drainage requirements of the site. Even a perfectly solarized bed will fail if it sits in standing water, which encourages anaerobic bacteria and root rot. Many homeowners fail to check the percolation rate of their soil, leading to the “bathtub effect” where water gathers in the planting hole and cannot escape. Proper subgrade drainage and the installation of French drains or bioswales can mitigate these issues and protect your investment.
Another common failure is root overcrowding. Designing for the future size of a plant rather than its size at the time of purchase is a hallmark of professional planning. When plants are spaced too closely, they compete for nutrients and airflow, increasing the likelihood of pest outbreaks even in solarized zones. Furthermore, improper mulch depth can be detrimental; mulch that is too thick (over 4 inches) can suffocate roots and prevent water from reaching the soil, while mulch that is too thin fails to suppress weeds or insulate the ground. Finally, many irrigation systems are set to “set and forget” modes that do not account for seasonal shifts, leading to over-watering in the autumn or under-watering during the peak of summer.
Seasonal Maintenance
Landscape management is a year-round commitment that changes with the solar cycle. In the Spring, the focus is on awakening the garden. This involves light pruning, checking the integrity of irrigation emitters, and applying a pre-emergent fertilizer. If you planned your solarization for the previous summer, the spring is the ideal time to see the results as your chosen specimens emerge without competition.
During the Summer, the priority shifts to hydration and heat management. For areas undergoing solarization, this is the active phase. For the rest of the garden, deep watering in the early morning hours is essential to prevent evaporation. Autumn is the season for replenishment; adding compost to the topsoil and planting bulbs ensures a vibrant display for the coming year. It is also the time to check the structural integrity of decking and fencing.
Finally, Winter is the season of protection. In colder climates, some plants may require burlap wraps or extra mulch to protect against frost heave. This is also the best time for “dormant pruning” of deciduous trees, allowing the landscape architect to see the branch structure clearly and make corrections that will define the tree’s shape for the next growing season.
Professional Landscaping FAQ
How deep does soil solarization reach?
Most effective heat penetration occurs in the top 6 to 12 inches of soil. This is where the majority of weed seeds and soil-borne pathogens reside, making it ideal for prepping flower beds and turf areas.
Can I use solarization in a shady yard?
Solarization requires direct, intense sunlight to reach the necessary temperatures for sterilization. If your landscape is heavily shaded by large oak or maple trees, this method will likely not achieve the heat required to be effective.
Will solarization kill beneficial earthworms?
While the heat can be intense, most mobile beneficial organisms, including earthworms, will migrate deeper into the cooler subsoil layers during the process. They typically return to the surface once the plastic is removed and temperatures stabilize.
What is the best plastic for solarization?
A clear, UV-stabilized polyethylene plastic with a thickness of 1.5 to 2 mil is recommended. This thickness is durable enough to resist tearing while remaining thin enough to allow maximum heat transfer into the earth.
Is it safe to plant immediately after treatment?
Yes, once the plastic is removed and the soil has cooled to ambient temperatures, you can begin planting. In fact, the “nutrient flush” often caused by the breakdown of organic matter makes it an excellent time for installation.