
Landscape aesthetics rely heavily on the health and uniformity of ground cover materials. When homeowners or commercial property managers invest in high-quality hardwood mulch or pine bark nuggets, they expect a clean, textural finish that complements the surrounding flora. However, during periods of high humidity or excessive rainfall, a common biological phenomenon known as Fuligo septica, or slime mold, often appears. Frequently referred to as “dog vomit” slime mold due to its yellow, amorphous appearance, this organism is not a plant pathogen or a sign of poor garden health. Instead, it is a primitive, single-celled organism that thrives on decaying organic matter. While it is harmless to humans, pets, and the plants themselves, its presence can significantly detract from curb appeal and the intended visual balance of a professionally designed outdoor environment. Managing this growth requires a blend of proper site planning, moisture control, and specific natural removal techniques that preserve the integrity of the soil ecosystem.
Integrated landscape management considers the mulch bed as a living component of the wider architectural plan. When a slime mold colony emerges, it usually signals that the environment is holding too much moisture or that the organic material is breaking down at an accelerated rate. As a landscape architect, my focus remains on the functionality of the space; if the drainage is poor or the mulch is too deep, the “floor” of the garden becomes a damp sponge. To address slimes molds effectively, one must look beyond the immediate yellow patch and evaluate the macro-environment. Effective Natural Slime Mold Removal involves physical extraction and environmental modification to ensure the surface remains dry and aerated. This prevents the plasmodium stage of the mold from maturing and spreading across the pavers, walkways, or stone edging that define the garden’s structural boundaries.
Landscape Design Principles
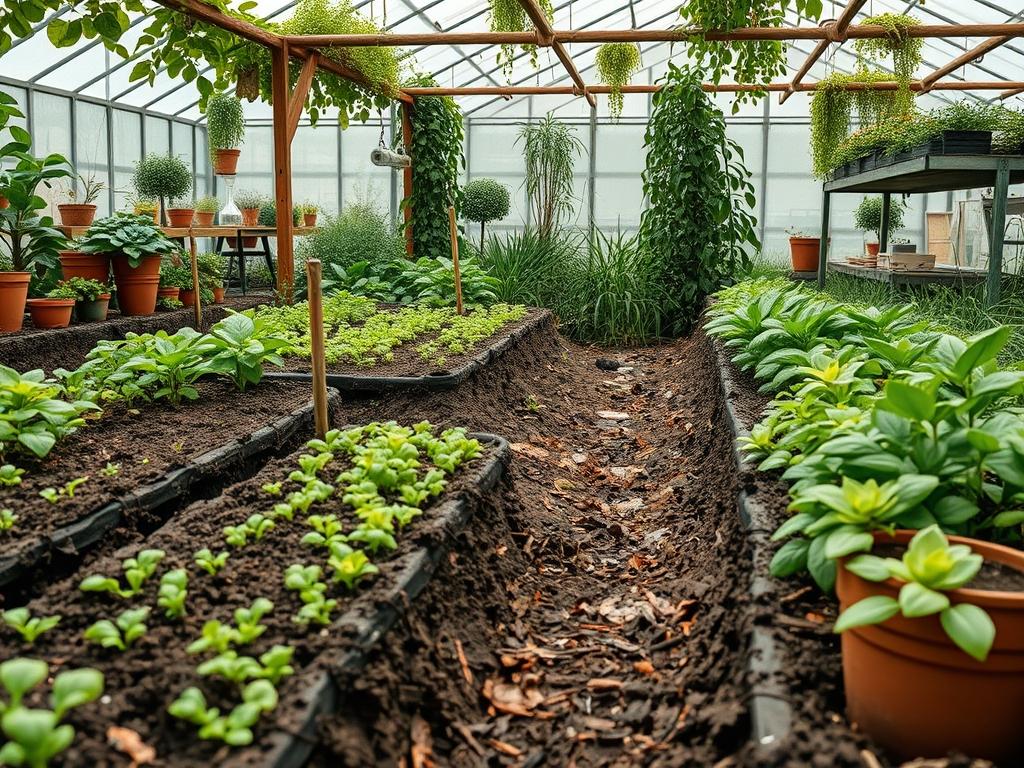
A sophisticated landscape design utilizes symmetry and focal points to lead the eye through the environment. When slime mold appears on a prominent mulch bed, it acts as a competing focal point that disrupts the intended visual rhythm. To mitigate this risk during the design phase, one must prioritize elevation layers. By creating a tiered garden bed with a slight grade, water is encouraged to move away from the center of the bed toward secondary drainage zones. This prevents the stagnation that favors fungal and slime mold growth.
Airflow is equally critical. In many residential designs, designers pack plants too tightly to achieve an “instant” mature look. This mistake restricts air circulation at the ground level, creating a micro-climate of high humidity. By strictly adhering to professional spacing guidelines for native shrubs and perennials, you allow the wind to dry the top layer of mulch. Incorporating stone walkways or gravel paths through large mulch areas also serves a dual purpose. They break up the organic mass and provide a non-organic barrier that does not host mold, while also offering access points for maintenance staff to reach the interior of the bed without compacting the soil. Visual balance is maintained when the mulch serves as a quiet backdrop rather than a source of distraction.
Plant and Material Selection
The following table outlines plants and materials that work well in a site-managed landscape where moisture control is a priority.
| Plant Type | Sun Exposure | Soil Needs | Water Demand | Growth Speed | Maintenance Level |
| :— | :— | :— | :— | :— | :— |
| Japanese Forest Grass | Partial Shade | Moist, Well-drained | Moderate | Medium | Low |
| Lavender | Full Sun | Sandy, Dry | Low | Fast | Medium |
| Boxwood | Full to Part Sun | Loamy, Drained | Moderate | Slow | High (Trimming) |
| Purple Coneflower | Full Sun | Average, Drained | Low | Fast | Low |
| River Birch | Full Sun | Wet to Moist | High | Fast | Medium |
| Cedar Mulch | N/A | High Tannin | N/A | N/A | Medium |
Implementation Strategy
Planning a layout that minimizes the need for chemical intervention starts with proper site grading. Before the first bag of mulch is spread, the soil must be sloped away from building foundations and toward a designated drainage area, such as a French drain or a rain garden. Once the grade is established, the application of mulch should be precise. I recommend a depth of exactly 2 to 3 inches. Any depth exceeding 4 inches prevents the soil from breathing and creates an anaerobic environment at the base, which is the perfect incubator for slime mold.
When a slime mold outbreak occurs, the first step is physical removal. Using a garden fork or a small shovel, lift the entire mass along with the inch of mulch directly beneath it. It is vital to do this before the mold turns black and powdery, as those black masses are spores that will be distributed by the wind or a garden hose. After removal, use a rake to fluff the remaining mulch. This increases the surface area exposed to the sun and air, significantly speeding up the drying process. For a natural chemical-free deterrent, you can lightly dust the affected area with cinnamon or a small amount of baking soda. Both substances alter the pH and provide antifungal properties without harming the earthworms or beneficial soil bacteria. Avoid the temptation to blast the mold with a high-pressure hose; this only provides the moisture it needs to regenerate and spreads the spores further into the garden.
Common Landscaping Failures
The most frequent failure I see in modern landscaping is irrigation inefficiency. Many automated sprinkler systems are set to run for short durations every single day. This keeps the very top layer of mulch permanently damp, which is ideal for slime mold. Instead, professionals recommend deep, infrequent watering cycles that allow the mulch surface to dry out completely between applications. Another common error is soil compaction. When construction crews or heavy mowers traverse mulch beds, they crush the air pockets in the soil. This leads to poor water infiltration and puddling.
Root overcrowding is another significant oversight. As ornamental trees and shrubs grow, their root systems can become a matted mess if not spaced correctly at planting. This competition for nutrients stresses the plants and can lead to a buildup of organic debris that fuels mold growth. Finally, the use of low-quality “free” mulch often introduces pathogens and weeds into a managed environment. It is always worth the investment to purchase triple-shredded hardwood mulch or cedar chips, as the natural oils in cedar are particularly resistant to fungal colonization.
Seasonal Maintenance
Landscape management shifts with the transition of the seasons, and each period requires a specific approach to mulch bed health.
In the Spring, the focus is on cleanup and refreshing. Remove any matted leaves that accumulated over winter, as these trap moisture and provide a food source for molds. If the existing mulch is still thick, simply rake it to break up the “crust” that forms on the surface. Only add a thin layer of new mulch—less than 1 inch—to restore color and aesthetic appeal.
During the Summer, heat and high-intensity storms are the primary drivers of slime mold. Monitor your irrigation closely. If the weather is particularly rainy, turn off the automated system entirely. If you spot slime mold during these hot months, remove it immediately during the heat of the day when the spores are less likely to survive the transition.
In the Autumn, as deciduous trees drop their foliage, keep the mulch beds clear. Decaying leaves are the primary nutrient source for many molds. This is also the time to check your site drainage and ensure that gutters are not overflowing directly into your garden beds.
Winter maintenance involves protecting the soil structure. Avoid walking on frozen or saturated mulch beds to prevent compaction. While slime molds are dormant in the winter, the groundwork you do now, such as pruning dead branches or thinning out overgrown perennials, will ensure better airflow when the warm, humid days of spring arrive.
Professional Landscaping FAQ
How can I quickly hide slime mold before an event?
If guests are arriving and you spot a yellow patch, do not spray it. Use a hand trowel to scoop the mass into a bucket and flip the surrounding mulch to reveal the dry side. This provides an instant visual fix.
Is slime mold a sign that my plants are dying?
No, slime mold is purely saprophytic, meaning it only consumes dead organic matter. It does not attack living plant tissue. Its presence simply suggests that your mulch is moist and decomposing, which is a natural, albeit sometimes unsightly, process.
Can I use vinegar for natural slime mold removal?
A diluted solution of one part white vinegar to four parts water can be sprayed on the area after the mold is physically removed. The acidity acts as a natural suppressant, but be careful not to spray the foliage of nearby flowers.
What is the best mulch to prevent mold growth?
Cedar mulch and cypress mulch are superior options because they contain natural resins and oils that repel many types of fungi and molds. They also decompose much slower than standard dyed wood chips or pine straw.
Should I use landscape fabric under my mulch?
As a consultant, I generally advise against landscape fabric in mulch beds. It often traps moisture against the soil and prevents natural aeration. Over time, silt builds up on top of the fabric, allowing mold to grow anyway.