
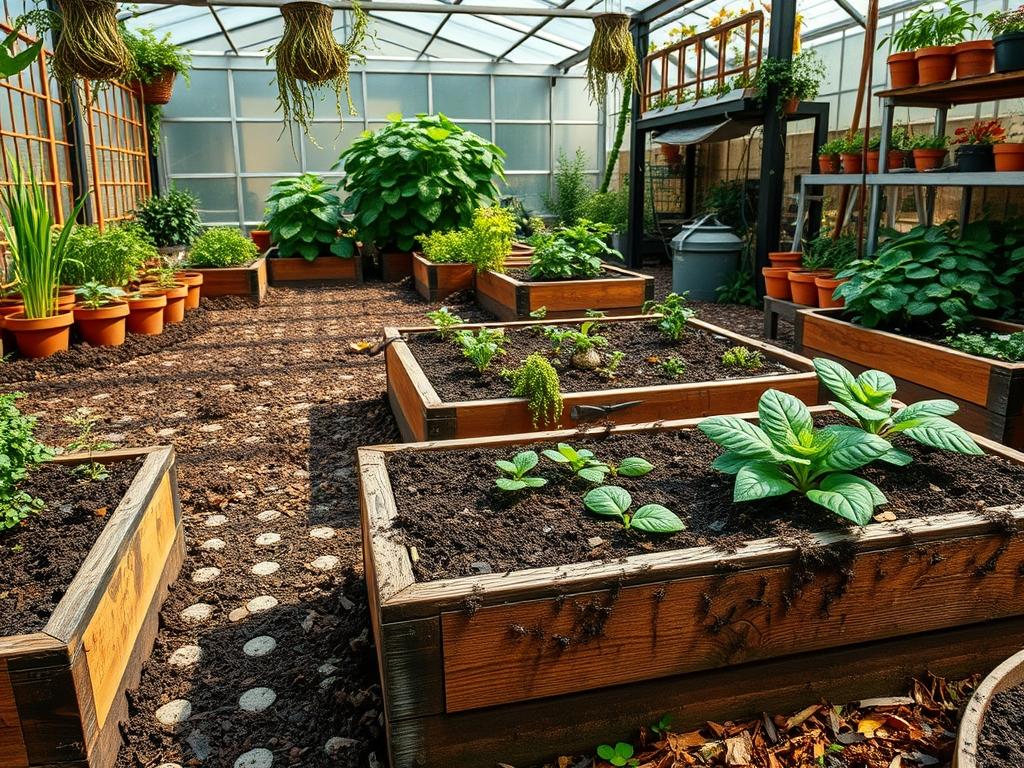
High end landscape design relies on the delicate balance between aesthetic beauty and structural integrity. When we integrate Raised Garden Beds into a professional site plan, we view them as more than just containers for vegetation; they are functional architectural elements that define the geometry of an outdoor living space. However, these elevated structures often face a hidden challenge that can compromise both plant health and “curb appeal.” Integrated pest management, specifically regarding Ants in Raised Beds, is a critical component of a long term maintenance strategy. In many temperate and subtropical climates, the warm, well drained soil within a raised bed provides an ideal nesting site for various ant species. While ants are not always directly harmful to plants, their presence often signals an underlying issue, such as an infestation of aphids or a lack of soil moisture consistency. A professional consultant must address these colony sites through natural, sustainable methods that protect the integrity of the Native Plants and the safety of the surrounding environment.
Properly managed beds act as focal points that enhance the “outdoor functionality” of a backyard. If a colony of ants begins to undermine the soil structure, it can lead to uneven settling or “slope failure” within the bed itself. This displacement of soil can expose root systems to air, leading to desiccation and a decline in floral vigor. From a landscape architect’s perspective, the goal is to create a resilient ecosystem where natural deterrents and smart material choices minimize the need for harsh chemical interventions. By focusing on site preparation and specific botanical selections, we can maintain the visual balance and structural stability expected in a high quality landscape.
Landscape Design Principles
A successful garden layout requires a focus on symmetry and “visual balance” to ensure the space feels intentional and professional. When planning for Raised Garden Beds, the “elevation layers” must be carefully calculated. We often use varying heights, such as a 12 inch tier for low succulents and a 24 inch tier for deeper rooted vegetables, to create a sense of movement. This verticality also serves a functional purpose. Taller beds can sometimes discourage certain ground dwelling insects, though they also retain more heat, which can attract ants looking for a stable incubation environment. To counter this, “irrigation planning” must be precise. Ants prefer dry, undisturbed soil. By installing a Drip Irrigation System that maintains a consistent moisture level throughout the entire soil profile, we make the environment less hospitable for colony establishment.
Walkways and “hardscaping” also play a role in ant management. Using materials like Crushed Granite or Pea Gravel around the perimeter of the beds creates a dry “buffer zone.” These materials do not retain the organic matter that ants use for food, and they facilitate rapid “drainage,” preventing the damp conditions that attract secondary pests like aphids or scale. Focal points, such as a large Urn or a Cedar arbor, should be placed strategically to draw the eye away from utility areas, while the actual beds are structured using “clean lines” and “geometric alignment.” This creates a structured environment where every element, including the soil and the organisms within it, is managed as part of a cohesive whole.
Plant and Material Selection
Selecting the right materials and botanical species is the first line of defense against unwanted insect activity. The following table provides a professional guide for selecting plants and materials that contribute to a resilient, ant resistant landscape.
| Plant Type | Sun Exposure | Soil Needs | Water Demand | Growth Speed | Maintenance Level |
| :— | :— | :— | :— | :— | :— |
| Lavender | Full Sun | Sandy, Alluvial | Low | Moderate | Low |
| Peppermint | Sun to Part Shade | Rich, Humus | High | Fast | Moderate |
| Rosemary | Full Sun | Well-drained | Very Low | Moderate | Low |
| Chrysanthemums | Full Sun | Potting Mix | Medium | Moderate | High |
| Catnip | Full Sun | Adaptable | Moderate | Fast | Low |
| Cedar Wood | N/A (Material) | N/A | N/A | N/A | Low |
| Hardware Cloth | N/A (Material) | N/A | N/A | N/A | Low |
Using Cedar or Redwood for the construction of the beds is highly recommended. These woods contain natural oils that act as a deterrent to many wood boring insects and ants. Additionally, incorporating Lavender and Rosemary around the edges of the bed provides a biological barrier; the strong essential oils in these plants are naturally repellent to scouting ants.
Implementation Strategy
The “implementation strategy” for a professional garden begins with “grading.” The area beneath and around the raised beds must be perfectly level to ensure even “drainage.” Before the beds are placed, we recommend clear cutting any existing turf and laying down a heavy duty Landscape Fabric or a layer of Hardware Cloth with a 1/4 inch mesh. This prevents larger pests and rodents from burrowing up from beneath while still allowing for microbial exchange. Once the frames are in place, the “soil composition” becomes the priority. A mix of 60% Topsoil, 30% Compost, and 10% Potting Soil creates a nutrient rich environment that supports vigorous plant growth.
When filling the beds, avoid using too much “mulch” on the surface if ants are a known issue. Instead, use a thin, 2 inch layer of Pine Bark Finishes or Rice Hulls. For a natural ant deterrent, we often integrate Diatomaceous Earth into the top 3 inches of the soil. This silica based powder is harmless to humans and pets but is abrasive to the exoskeletons of crawling insects. If an active colony is detected, a mixture of Boric Acid and sugar water can be placed in a controlled “bait station” near the exterior base of the bed. This allows the workers to carry the solution back to the queen, neutralizing the colony without saturating your growing medium with toxins. “Edging” the beds with Steel Edging or Stone Pavers also provides a clean break that makes it easier to spot and disrupt ant trails before they reach your plants.
Common Landscaping Failures
One of the most frequent errors in “outdoor living” projects is poor “irrigation management.” Overwatering creates anaerobic cushions in the soil, while underwatering creates the dry, cavernous voids that ants love. A lack of proper “drainage” often leads to soil “compaction,” which reduces the oxygen available to plant roots and encourages ants to “till” the soil themselves, creating further instability. Another common failure is “root overcrowding.” When plants are spaced too closely, it creates a humid, dark microclimate at the soil surface. This “canopy density” protects ants from predators and makes it difficult for a homeowner to inspect the stems for “aphid farming.”
We also see many DIY projects fail due to “improper mulch depth.” Applying deep mulch directly against the wooden walls of a raised bed creates a moist bridge that ants and termites use to bypass natural barriers. Finally, neglecting the “sub-grade” preparation can lead to the bed sinking over time. An uneven bed will have dry spots and wet spots, creating a “moisture gradient” that acts as a magnet for different types of ant species searching for the “perfect” nesting conditions.
Seasonal Maintenance
Landscape management is a year round commitment. In the Spring, the focus is on “structural inspections.” Check the joints of your Cedar beds for any gaps where ants might enter. Apply a fresh coating of Neem Oil to the base of your plants to discourage aphids, which are the primary reason ants are attracted to gardens in the first place. This is also the time to refresh your Diatomaceous Earth applications after the heavy spring rains have subsided.
During the Summer, “water management” is the priority. Ensure your Drip Irrigation is functioning correctly and that there are no “dry pockets” in the corners of the beds. If you notice ant activity peaking in the July heat, increase the frequency of your “soil monitoring.” In the Autumn, clear away fallen debris and “spent foliage.” Decaying organic matter provides food and cover for queen ants looking for a place to overwinter. Finally, in the Winter, focus on “hardscape maintenance.” Clean your Walkways and check your Retaining Walls for cracks. By maintaining a clean, professional “site layout” throughout the dormant season, you ensure that the “curb appeal” of your landscape remains high and that the ant population is kept in check before the next growing cycle begins.
Professional Landscaping FAQ
How do I quickly stop ants from nesting in my beds?
Disturb the nest by drenching the soil with a mixture of Orange Oil and water. Use a Garden Trowel to turn the top 6 inches of soil; this disruption often forces the colony to relocate to a more stable environment.
Will ants actually damage my vegetable crops?
Ants rarely eat the plants themselves. Instead, they protect “sap-sucking pests” like aphids from natural predators. This “mutualism” can lead to stunted growth and yellowing leaves as the aphids drain the plant’s essential nutrients and energy.
Is there a specific mulch that ants dislike?
Cedar Mulch is highly effective as a natural deterrent due to its aromatic oils. Avoid using heavy, dye treated hardwood mulches, as these can retain excessive moisture and provide a dense cover that helps ant colonies thrive undisturbed.
Can I use professional grade barriers to stop them?
Yes, applying a thin strip of Sticky Barrier Tape or a layer of Cinnamon around the top edge of the bed frame can prevent ants from climbing. These physical and olfactory barriers are excellent non-toxic ways to protect your “focal points.”
Are all ants in the garden considered the same?
No; some species, like Fire Ants, are invasive and aggressive, requiring immediate action. However, small numbers of native ants can actually help “aerate” the soil. A consultant will prioritize managing the population rather than attempting total eradication.